A Beginners Guide to Building a 3-Walled Set
This type of set has increased in popularity in recent years as more and more YouTubers want their own set in which to create their videos.

1 – Design Drawings
If possible, create the set you want by using SketchUp or AutoCAD. Or hand draw your set or make a simple model out of cardboard.
Make sure the dimensions of your flattage are such that they will fit into both your transport and your location or studio. Your 3 flats will duly be stood up on site.


2 – Your Flattage
A flat is made from a thin sheet of plywood with a softwood timber frame fixed to the back, enabling it to be light and strong.
Decide what finish you want, for example, as here a brick effect, or paint or wallpaper.
3 – Building Your Set
Flattage
Each flat will be positioned in the studio or location and braced off – as seen in the SketchUp image above, and the photo below. In some cases, you will be able to drill into the floor to secure the flat, but if not, you will need to use stage weights on the braces.

Flooring
You may choose to paint the floor, or lay carpet. In some instances, you would lay the flooring onto the studio floor before standing up the flats. In the photo below we have used a wood effect lino which was laid before standing up the flats.
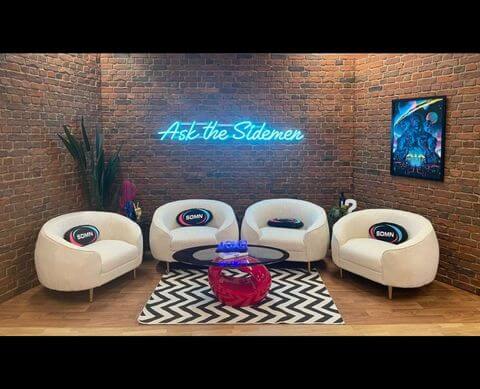
This set was used by the Sidemen for their video Ask The Sidemen
5 – Strike and Reuse
Once you’ve completed your shoot, you will strike (dismantle) the set.
You now have flattage that can be used again, given a new finish.
Many companies hire recycled flattage, Scenery Salvage is an example, or you can pick them up from a site like Set, Swap, Cycle. Alternatively, you will go to a construction company who will build your flats for your project.
If you would like Totom to quote you for a set design, call Danny on 07703 186 243, or email us at info@totom.co.uk
Construction by Totom